Hi,
In this tutorial, I will show you how to use perspectives with photoshop.
In this tutorial we are going to do a perspective with a reflect and a shadow to give to our image a 3D effect.
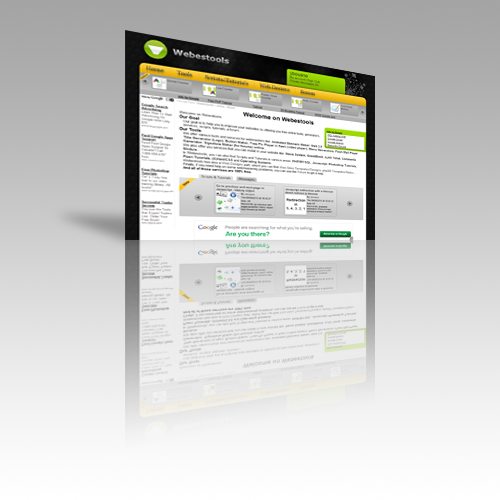
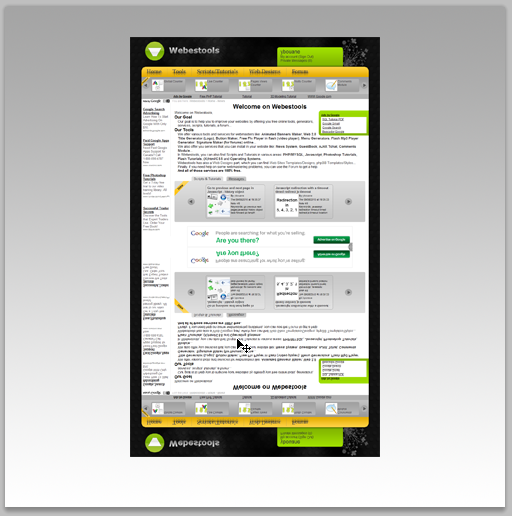
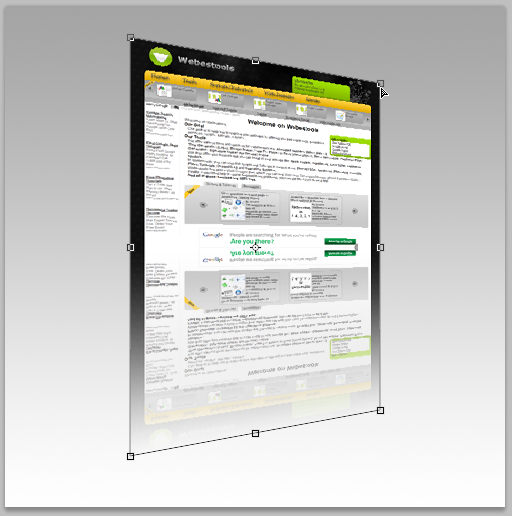
Here is the final result of this tutorial:
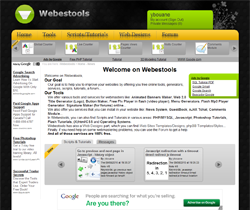
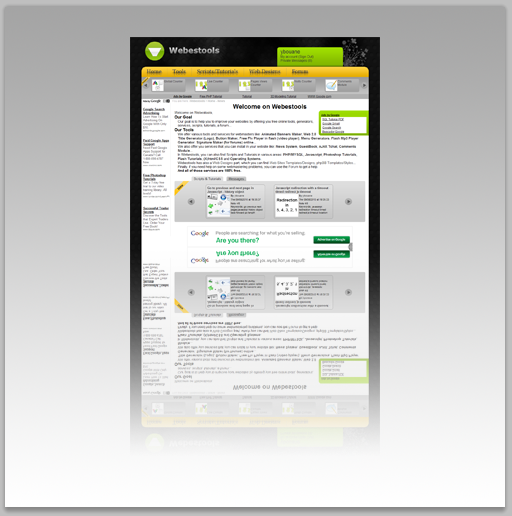
This is the image we are going to use in this tutorial:
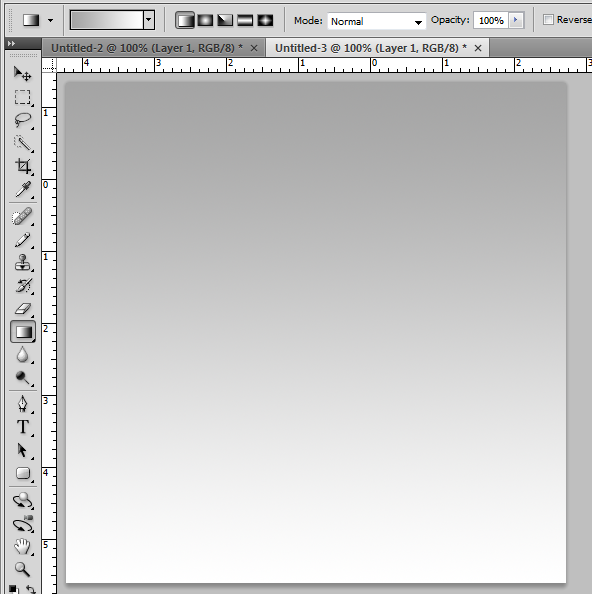
First open Adobe Photoshop and create a new 500px * 500px document.
With the Gradient Tool (G), trace one from #a4a4a4 to #ffffff like in this image:
Copy the image wich you want to apply the perspective and position it at the center top of the document:
Dupplicate your image by right clicking on it layer and by choosing Dupplicate Layer.
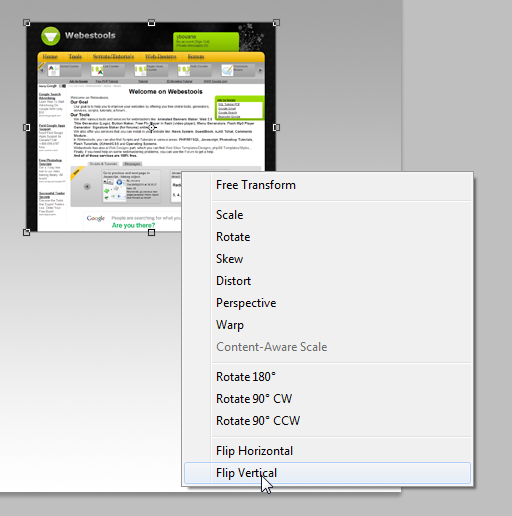
Then in the new layer, right click on the work space and choose Free Transform.
Again in right click on your image and choose Flip Vertical.
Now position the reflection layer just under the original image.:
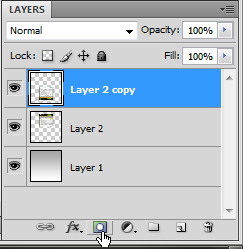
Staying in the reflection layer add a Layer Mask by clicking on the small icon like in this image:
Add a gradient from black to white like in this image:
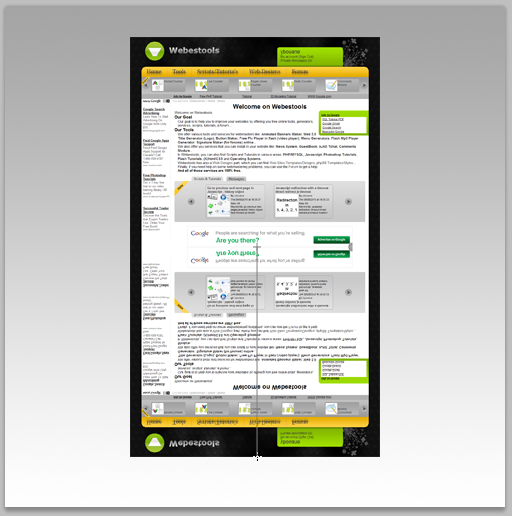
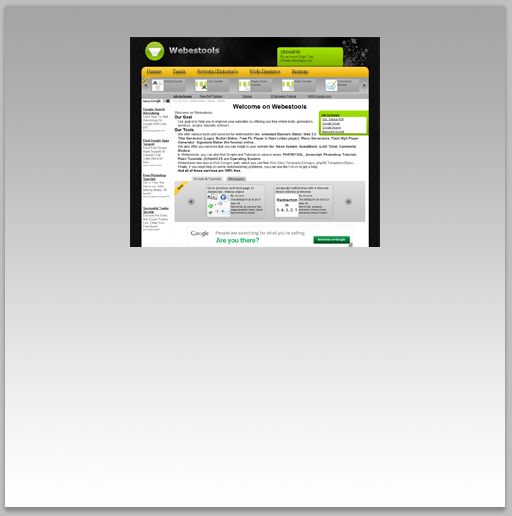
You should get something similar to:
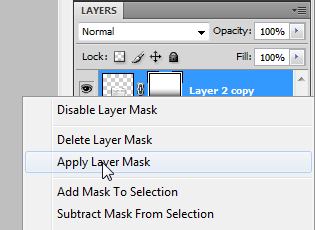
Now to validate your mask right click on the second thumbnail of the relfection layer and choose Apply Layer Mask.
Maintaining the Ctrl key of your keyboard, click on the original image. Now you have the reflect and the image both selected.
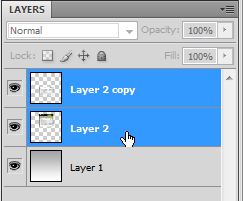
Right click on the Work Space and choose Free Transform.
Right click again and choose Perspective.
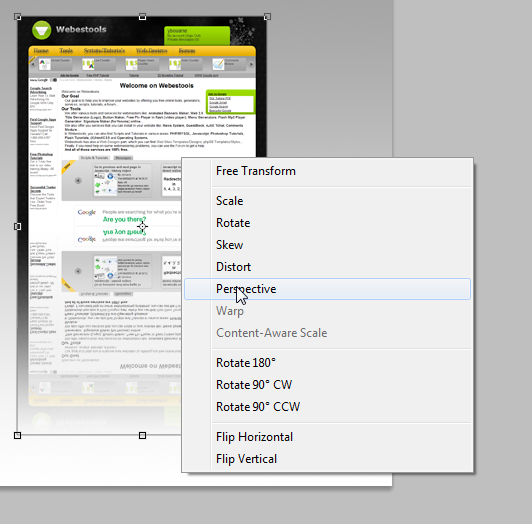
Drag the top right corner and lower it like this and click on Enter to validate:
Click on the reflection layer and lower it Opacity to 55%.

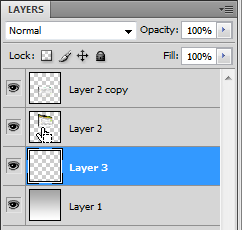
Create a new layer and put it just behind the two firsts.
Click on the Ctrl key of your keyboard and without releasing click on the thumbnail of the original image layer.
Now you are in the new empty layer with the selection of the original image.
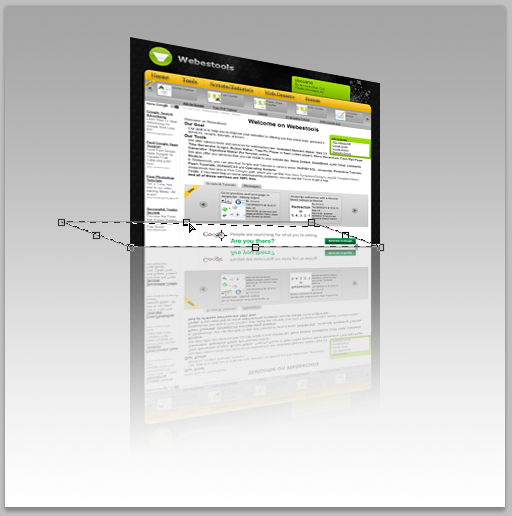
Right click on the Work Space and choose Free Transform.
Right click again and choose Distort.
Click on the top center square and drag it like in this image:
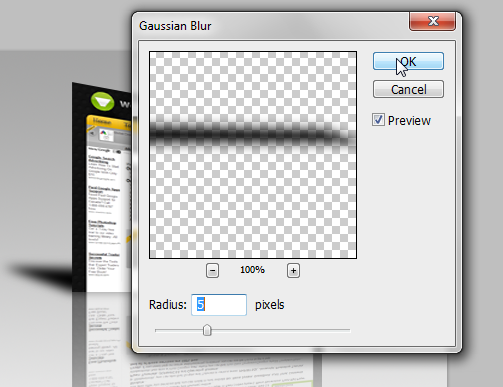
Click on Enter. In the Main Menu click on Filter -> Blur -> Gaussian Blur.
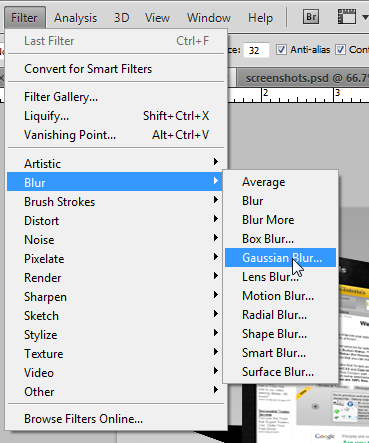
A window will appear. Change the radius to 5.
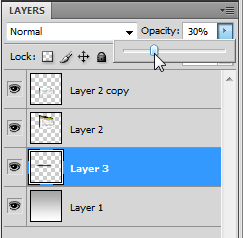
Lower the opacity of the shadow to 30%.
That's it, you just made a perspective with a reflect and a shadow with Adobe Photoshop.
Thank you and I hope this tutorial will be useful.
Similar Scripts and Tutorials
![[Tutorial] Perspective with a reflect and a Shadow in Photoshop](http://www.webestools.com/ftp/ybouane/scripts_tutorials/photoshop/perspective_reflect/img_preview.png) The 13/07/2011 at 23:28:31
The 13/07/2011 at 23:28:31![[Tutorial]Reflection with GIMP (Perspective reflection)](http://www.webestools.com/ftp/ybouane/scripts_tutorials/gimp/reflect/img_preview.png) [Tutorial]Reflection with GIMP (Perspective reflection)
[Tutorial]Reflection with GIMP (Perspective reflection)
![[Tutorial] Black and White image in Photoshop from a colored image](http://www.webestools.com/ftp/ybouane/scripts_tutorials/photoshop/black_and_white/img_preview.png) [Tutorial] Black and White image in Photoshop from a colored image
[Tutorial] Black and White image in Photoshop from a colored image
![[Tutorial]Add a reflect to an image with photoshop](http://www.webestools.com/ftp/ybouane/scripts_tutorials/photoshop/reflect/img_preview.png) [Tutorial]Add a reflect to an image with photoshop
[Tutorial]Add a reflect to an image with photoshop
![[Tutorial]Border on an image with GIMP](http://www.webestools.com/ftp/ybouane/scripts_tutorials/gimp/border/img_preview.png) [Tutorial]Border on an image with GIMP
[Tutorial]Border on an image with GIMP
![[Tutorial]Fusion between 2 images with layers masks (Photoshop)](http://www.webestools.com/ftp/ybouane/scripts_tutorials/photoshop/merge_images/img_preview.png) [Tutorial]Fusion between 2 images with layers masks (Photoshop)
[Tutorial]Fusion between 2 images with layers masks (Photoshop)