Hi,
In this tutorial, I will teach you
how to make web 2.0 buttons with photoshop.
This is the final result of this tutorial:

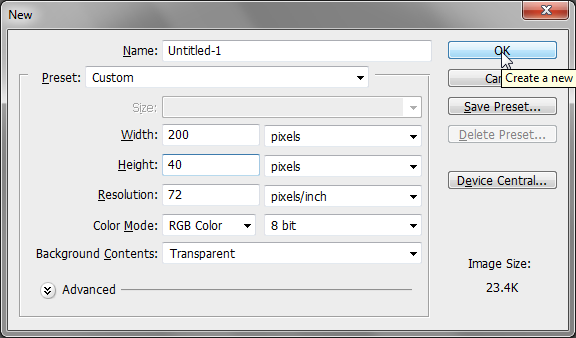
Step 1
Create a new document
200px * 60px.
Step 2
With the
Rectangular Marquee Tool(M), draw a selection like:

Step 3
With the
Paint Bucket tool(G), fill the selection with the white color.

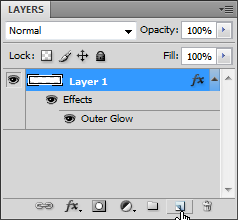
Step 4
Double-Click on the layer thumbnail and in the
Outer Glow tab, use the following settings:

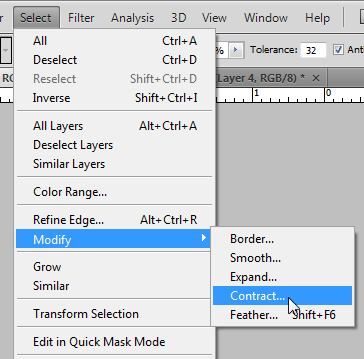
Step 5
Click on
View ->
Modify ->
Contract.
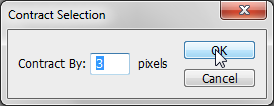
Step 6
Contract the selection by
3 pixels.
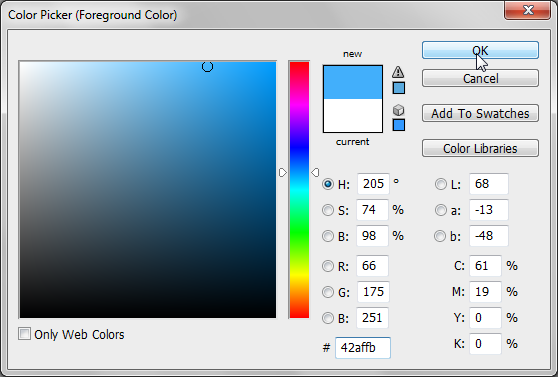
Step 7
Change the Foregound color to #
42affb.
Step 8
Create a new layer.
Step 9
Fill the selection.

Step 10
Download the following gradient:

Download the Gradient file
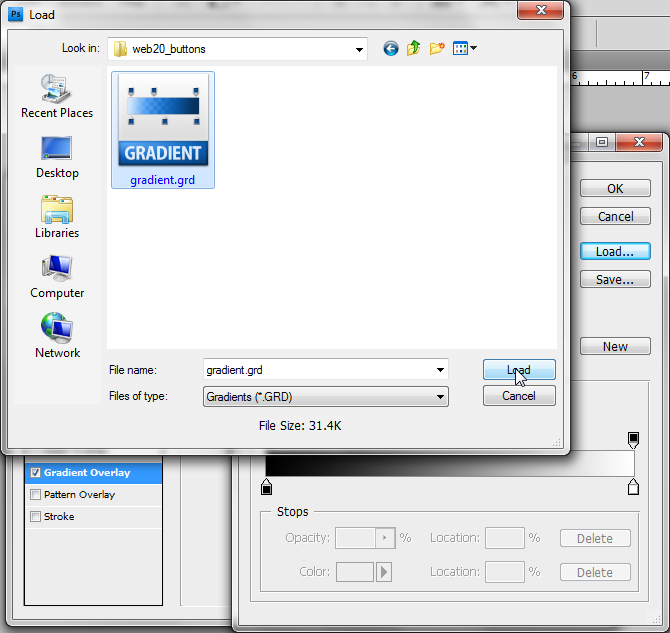
Step 11
Double-Click on the layer thumbnail. Go to the
Gradient Overlay tab. Click on the
gradient. Click on
Load and select the gradient.
Step 12
Choose the
Text Tool(T). Click on the center bottom of the image and write the content of your button. Use the following settings.

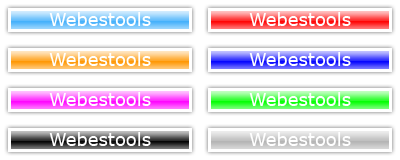
That's it, you finished your
web 2.0 button. It should look like:
You can easily change the color of your button:
I hope this photoshop tutorial will be useful.
Similar Scripts and Tutorials
![[Tutorial]Create a web 2.0 button with photoshop](http://www.webestools.com/ftp/ybouane/scripts_tutorials/photoshop/web20_buttons/img_preview.png) The 11/07/2011 at 18:25:57
The 11/07/2011 at 18:25:57![[Tutorial]Make an Apple Bar with photoshop](http://www.webestools.com/ftp/ybouane/scripts_tutorials/photoshop/apple_bar/img_preview.png) [Tutorial]Make an Apple Bar with photoshop
[Tutorial]Make an Apple Bar with photoshop
![[Tutorial]Border on an image with GIMP](http://www.webestools.com/ftp/ybouane/scripts_tutorials/gimp/border/img_preview.png) [Tutorial]Border on an image with GIMP
[Tutorial]Border on an image with GIMP
 Simple PHP Forum Script - php forum easy simple script code download free php forum mysql
 Top site PHP script - install a php top site on his web site